Another Update On My Raspberry Pi Powered Model Rocket Telemetry System
Since first blogging about this project last year, I've gone through several iterative improvements of the platform, and so I'd like to share the latest and greatest on this project. This is one of those "never really done" side projects right now, and so long as I have time to devote to model rocketry and this work, I will continue to make improvements where I see fit, offer help where/when I can, and accept code and design contributions to the project. (I will post most updates here.)
Recall that in April, I published a post with info from a recent flight. Overall those flights were spectacular performances of the rocket itself, but the software came up short. In retrospect I over engineered the improvements to the platform and lost focus on simplicity, which is not wise when working in a space so fraught with potential for disaster. From that launch I took away some key lessons and somewhat went back to basics. Here's what I did:
Inboard Software: #
For that flight, I had refactored the software to devote a thread to monitoring each sensor. (Pressure/temp, acceleration/magnetic, and GPS) Another thread would continually loop and atomically access the latest data from the other threads to write to a log. Yet another thread would also do the same check but focus just on transmitting the reading over the LoRa transceiver. Finally one more thread would operate the video capture. This really didn't work.
The core problem was that the sensors report data out at vastly different speeds. The pressure sensor is slow, giving back data just a few times a second. The accelerometer/magnetometer is relatively fast and can give back readings nearly hundreds of times per second. Therefore in the log file it looks as if the pressure never changes while the attitude of the rocket seems to be all over the place. Analyzing that data is not fun nor does the added resolution of many accelerometer readings really improve anything. Also the GPS receiver never captured a signal.
Another big problem I did not fix from the first flight was the disk write lag. A few videos and some sensor data continued to "get lost" because I'd hard reboot the Pi before the disk had time to complete its writes. Hard reboots are also not terribly healthy for Raspberry Pis either.
Ground Tracking: #
The ground station did not do better. In fact it didn't work. I had rigged up the LoRa receiver to another Raspberry Pi Zero. The software on there was to do a simple job of reading from the LoRa and then pushing that data back out via a websocket. I had configured the Pi to treat the USB port as an ethernet link-local connection so that when I connected it to a laptop, it would assign the laptop an IP making two way communication between the devices simple. I should've anticipated this, but the Debian-powered Toughbook I picked up for this work only connected to the device 50% of the time - mainly just because Linux is finicky with these kinds of networking hacks. The day of the launch I wasn't lucky and it just couldn't connect.
The more complicated the plumbing ...
Updates: #
With a new focus on simplicity and resiliency, I made some core updates to the project to account for these naive design decisions on my part. While I do not know when I'll be able to run a full field test of these changes, I think they do a great bit in terms of making the project more stable. Here's the summary:
Inboard Software #
First off, I went back to a limited thread system. There's now one thread that reads the pressure/temperature sensor and the accelerometer/magnetometer and puts that data into a queue. Another thread reads the GPS signal. (This is a really slow sensor so it stays in its own lane.) There are still dedicated sensors for log writing, telemetry transmission, and video capture.
However, the big change here is solving for the disk write/reboot problem. I've added to the design a simple pushbutton that adds minimal weight but now gives me the ability to 'stop' the current session and start a new one. All of the threads in the system loop so long as a shared flag is set to true. Once the software detects the button push, it sets that flag to false and all threads wrap up their work on their own time and come to a close. Additionally, the video capture and log writing threads will naturally close after 10 minutes to prevent the disk from getting too full. This solution now allows safe stopping of the current session and clean writes to the disk so long as power is not interrupted in flight.
Inboard Hardware Chassis: #
When I first started this project, I had little experience using CAD/modeling tools to design parts for 3D printing. Largely out of ignorance I started with FreeCAD, which is an OK-at-best tool. Throughout the span of COVID, I've had more time to educate myself with modeling and I've since leveled-up to using Autodesk's Fusion360 - a far more powerful (and stable!) tool, despite it having some limits imposed by Autodesk to limit commercial use that actually get in the way of hobbyist use.
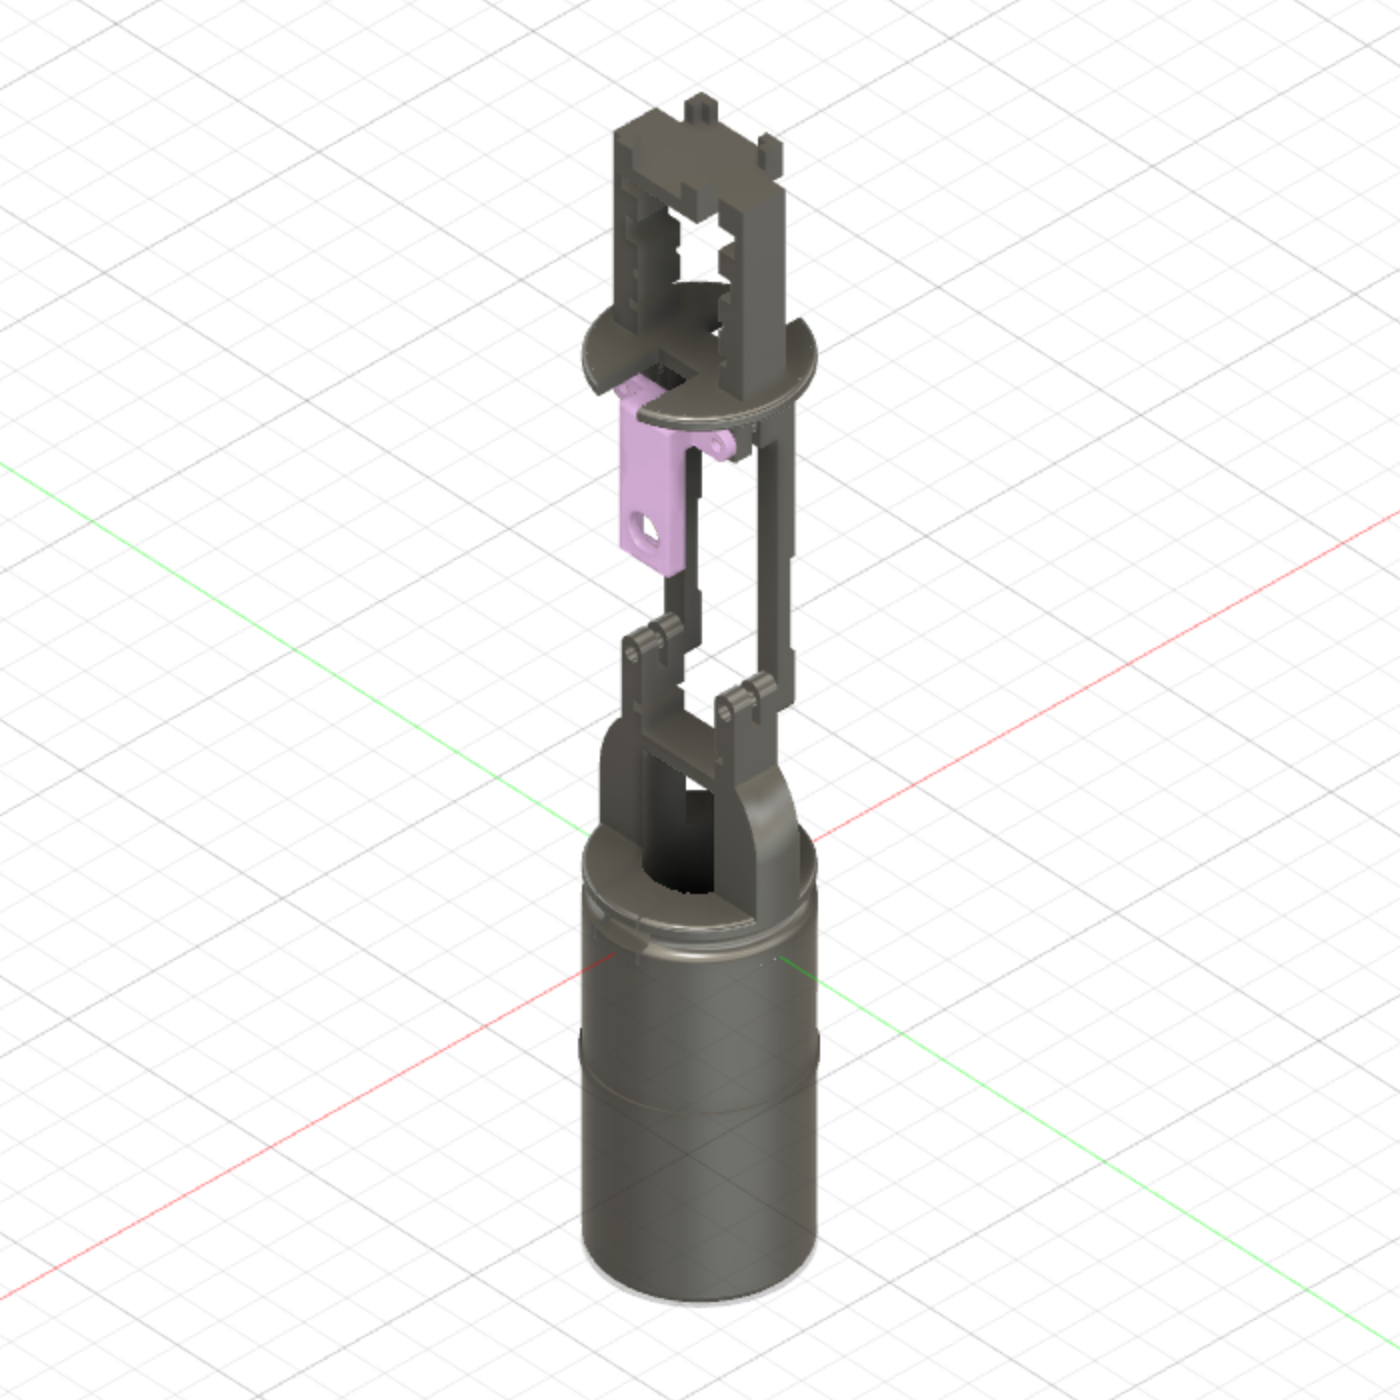
With these improved CAD skills, I've designed a better chassis for the hardware that improves on the following areas:
- Stronger coupler section
- Better connection between coupler and chassis
- Stronger frame above/below Raspberry Pi
- Better centering inside rocket fuselage
- More stable attachment of sensors, particularly the GPS antenna
- Mount for the restart button
Ground Tracking #
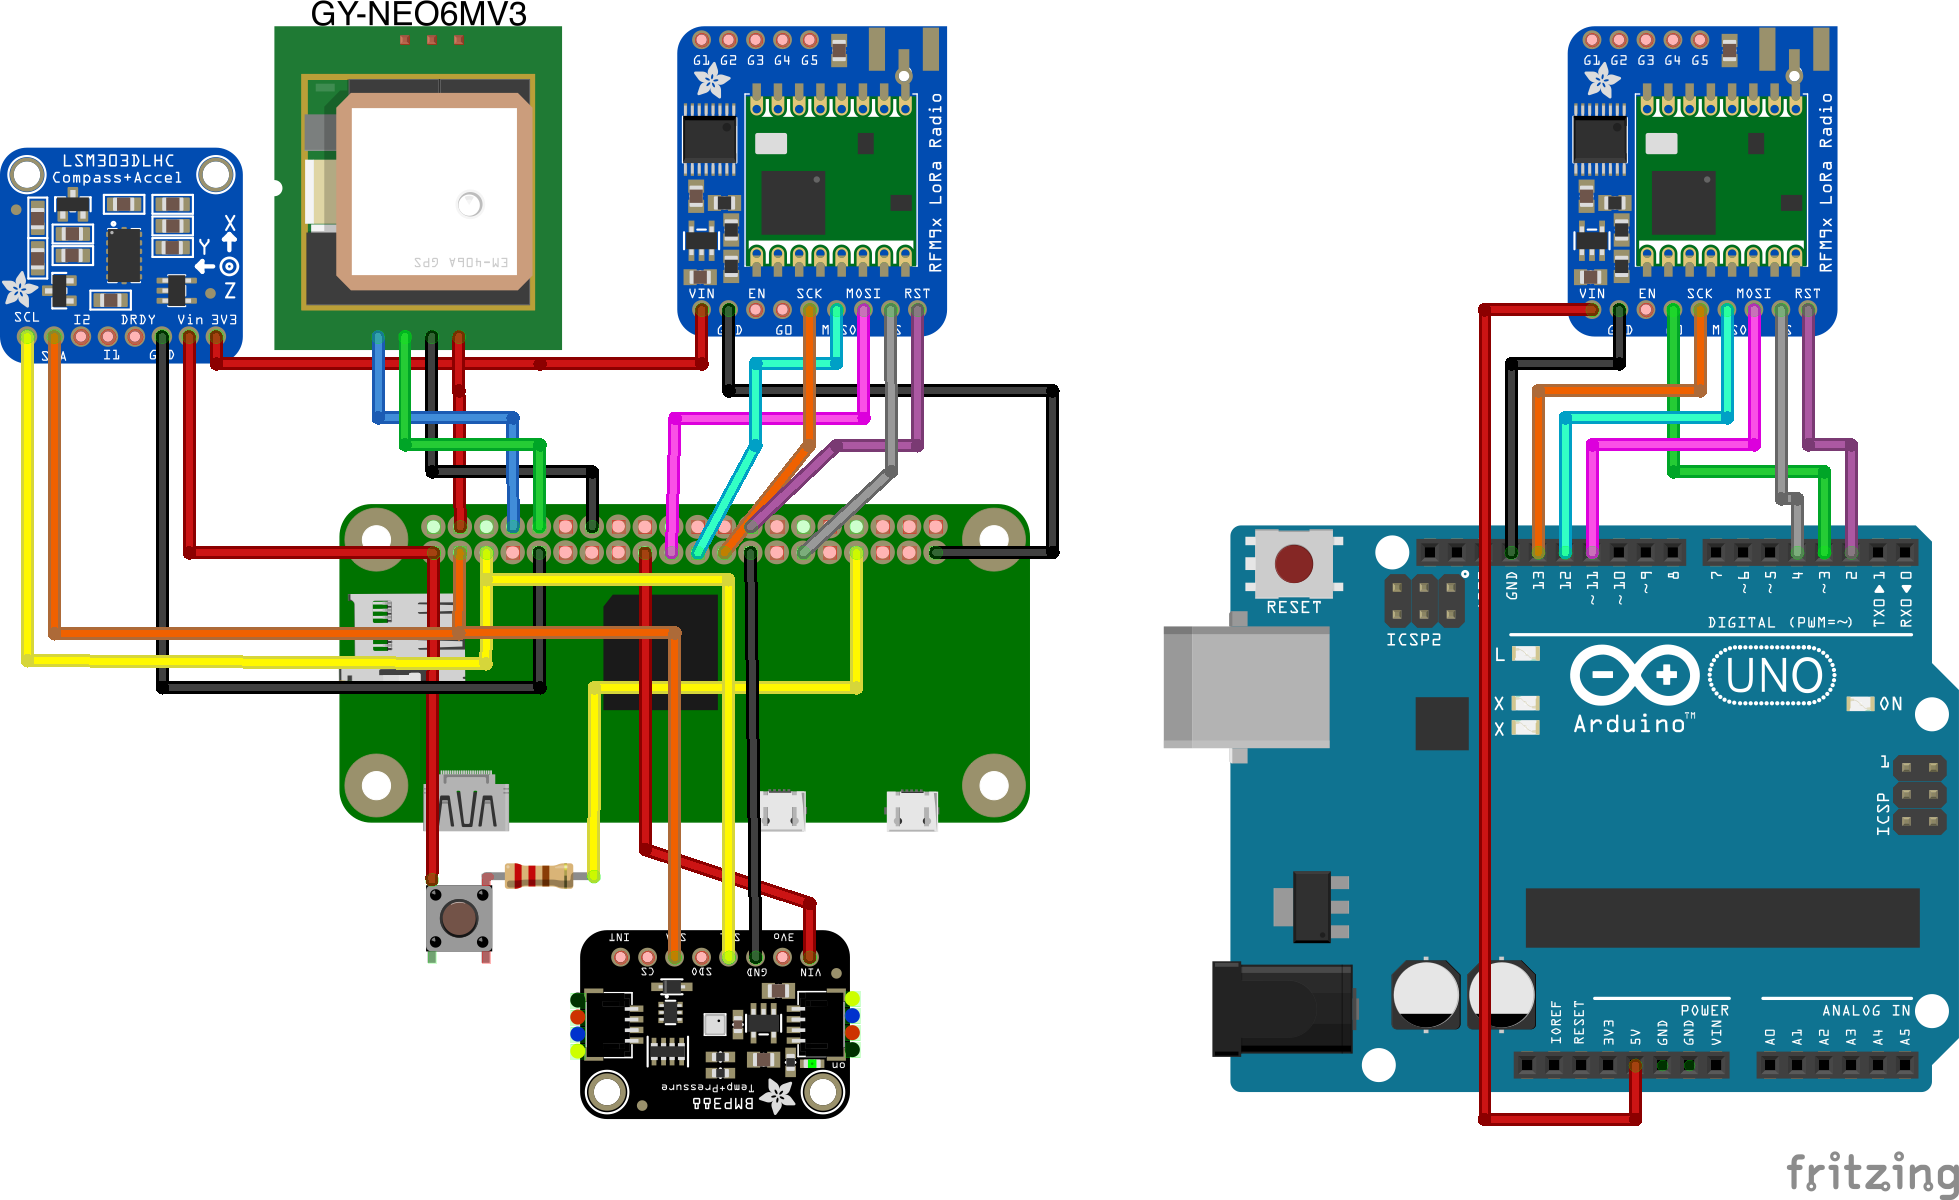
I also went way simpler here. Before I'd rely on a network level communication protocol between the receiver hardware and the laptop, and the dashboard software was - while beautiful - a pretty complex React/Electron application. Instead, I've now opted to use an Arduino Uno connected to the LoRa as the ground controller, and it sends signal data to the laptop using tried-and-true serial.
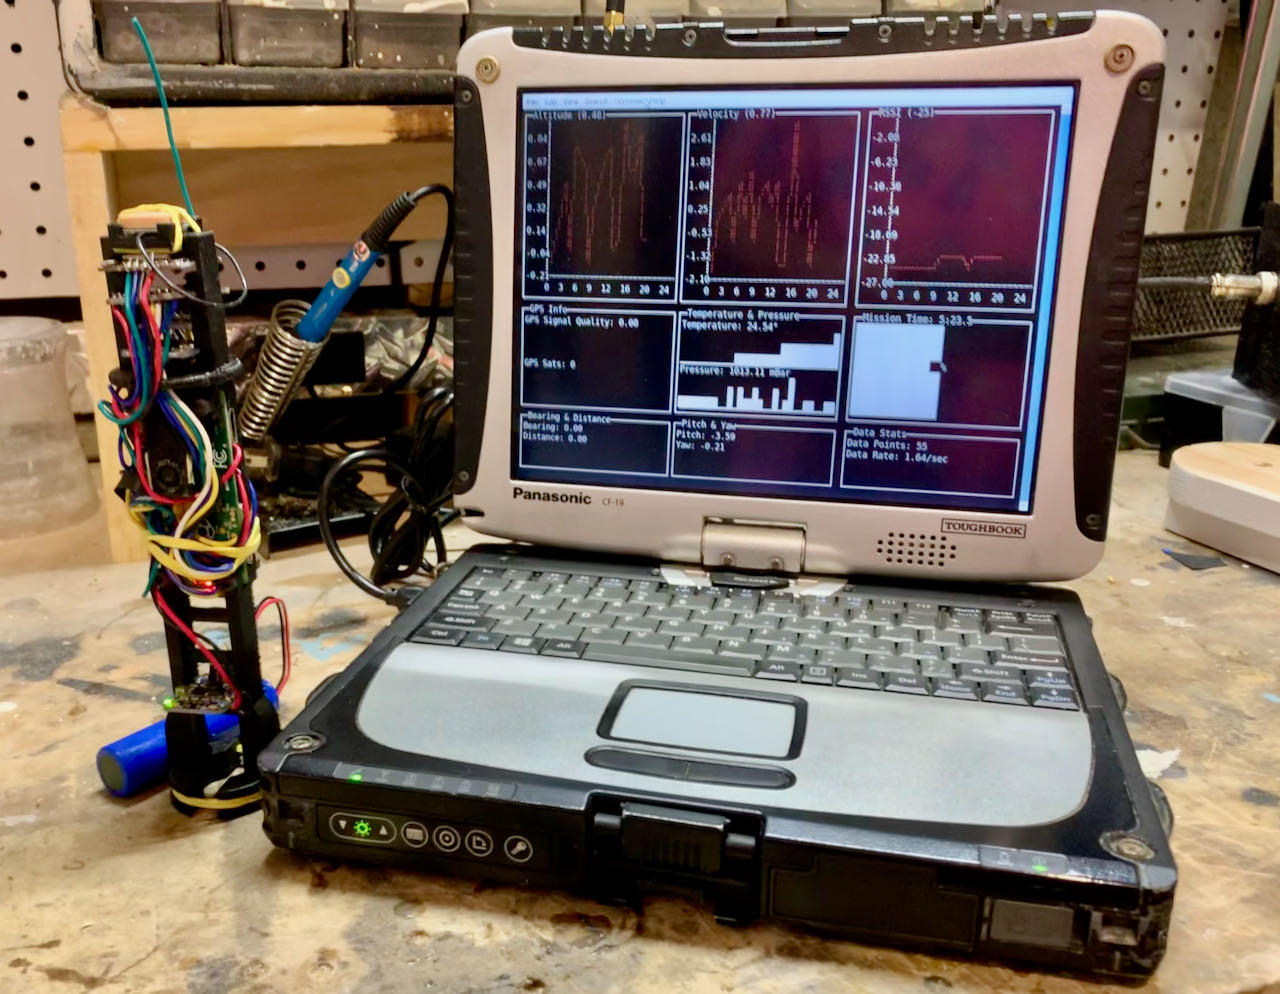
The ground station visualization software is also much simpler. Instead of the full blow React/Electron solution, I opted to write a quick tracking monitor in Go (which I've also been forcing myself to use more as part of a professional development goal) and render a terminal-based dashboard. Before doing this, I also spent a little time actually evaluating NASA's open source telemetry visualization software, but I felt that went against my newly-found principle that simplicity is paramount.
While a terminal-based dashboard offers less data resolution than a browser-based one and less general opportunities for visualization mediums, I feel this is the right choice because the key concern I have at these launches is: 'are we capturing good data?' A terminal-based dashboard can answer that question for me quickly without having to worry about the stability of the link-level connection, or if the the application is hogging too much battery in the field. It just works, and I can do the more fun visualizations later.
Next Steps #
As I said, I'm not sure when I'll get out to test this any time soon, but for now with my ground testing, this seems to be working very well. The only thing that doesn't seem to be working consistently is the GPS capture. The receiver is a passive antenna, which I understand is slower, but sometimes I still get no data at all. I've read a bit that the type of receiver I'm using doesn't perform well on battery, which is an obvious requirement here. Therefore I'm going to spend some time looking for a drop-in replacement that might work better on a battery.
If you have any tips on my GPS module search, or if you'd like help implementing this project for yourself, please get in touch using my contact form or via the GitHub project!