Capturing Model Rocket Telemetry Using a Raspberry Pi Zero (Part 2)
Q&A on Hacker News about this project
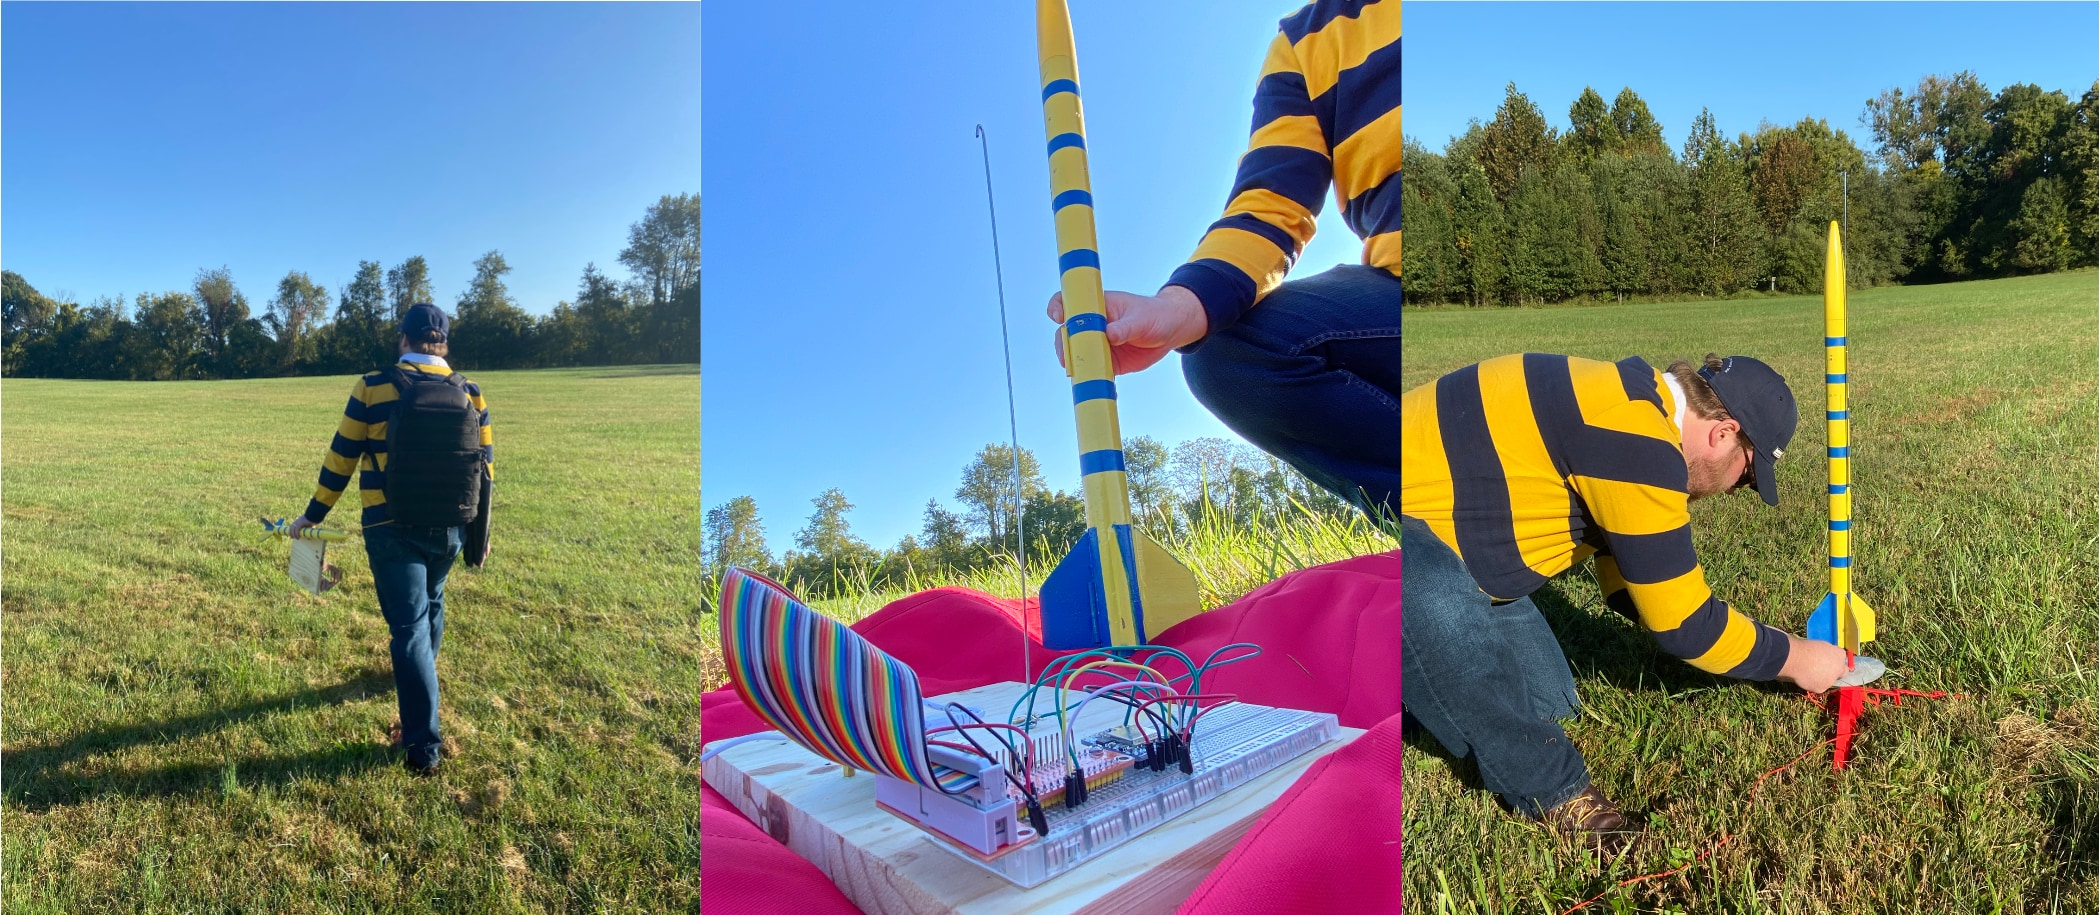
As we're driving out to our launch site in Leesburg, VA, my wife turns to me and asks, "did you intentionally wear a yellow and blue striped rugby shirt to match your yellow and blue striped rocket?" I look down, and realize that, yes I had indeed accidentally dressed exactly like my rocket. I wonder if that ever happens to Elon?
Launches #
Very special thank you to my exceptionally patient wife who tagged along, captured these great pictures, and ended up actually having a lot of fun with her very nerdy husband.
Ida Lee Park in Leesburg, VA allows rocket launches up to 400 feet with a permit, so I applied earlier in September for an October 3rd launch and received fast approval. With the day upon us, my wife and I made the 40 minute drive to Leesburg (apparently in uniform?), set up in our designated part of the park, and got to work.
Launch 1 #

The first launch was a huge success. The rocket reached 110.3 meters (~362 feet), which beat my simulation's prediction of 90 meters, and it reached a peak velocity of 41.69 meters per second (~93 mph) at 1.44 seconds into the flight. We can see the rocket started to descend very quickly after apogee, and the chute deployed successfully 7.5 seconds into the flight. From there, the chute allowed for a linear rate of descent to a gentle field landing.
Launch 2 #
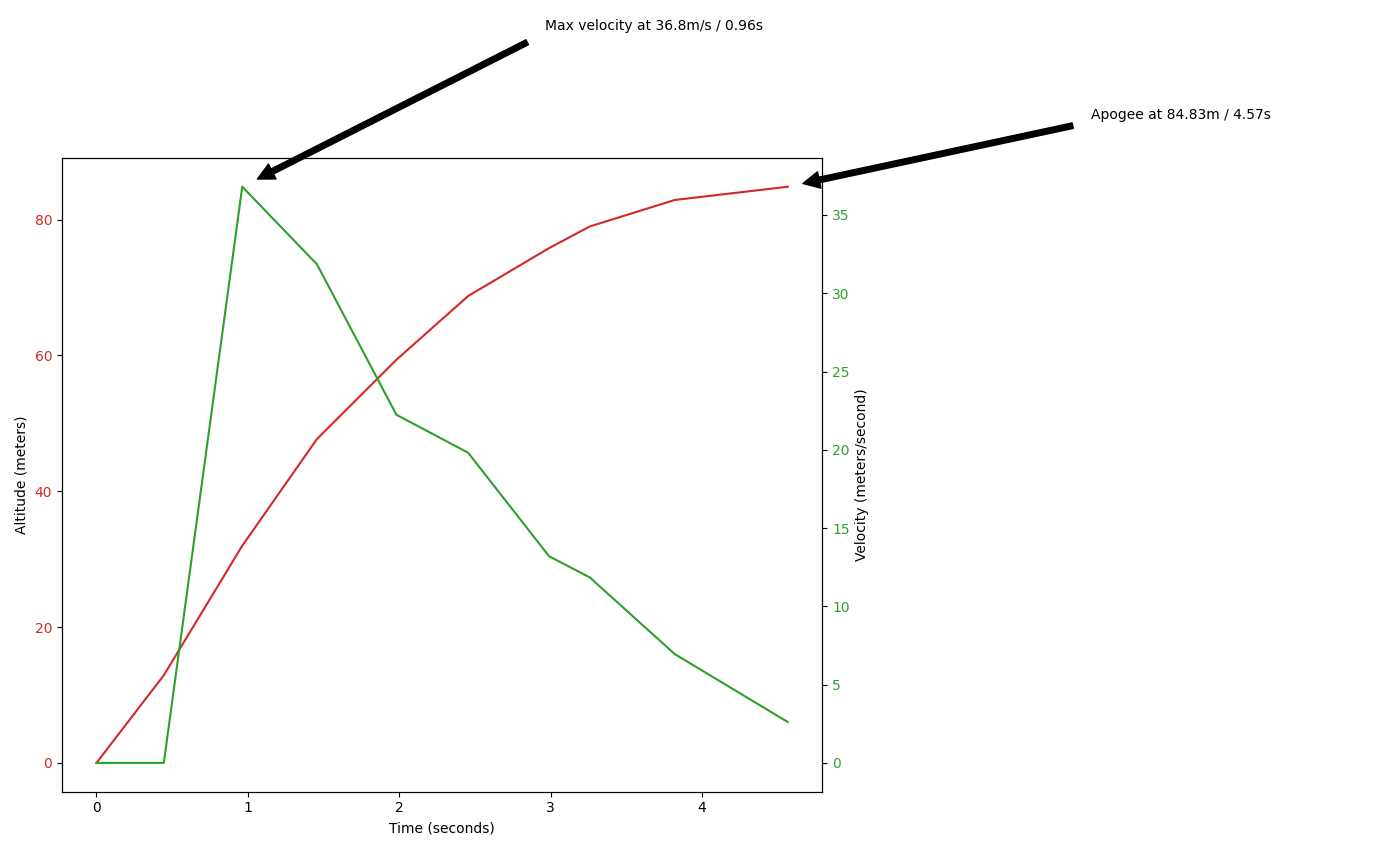
Launch 2 was less of a success. While the ascent went smoothly, telemetry was lost 4.57 seconds into flight and the ejection charge ripped the shock cord causing the two rocket components to separate with no parachute to slow their descent. This incident also knocked out the battery cable causing inboard video and data capture to also fail. Unfortunately no video data could be recovered.
Next Steps #
The second launch revealed three major issues that need to be resolved:
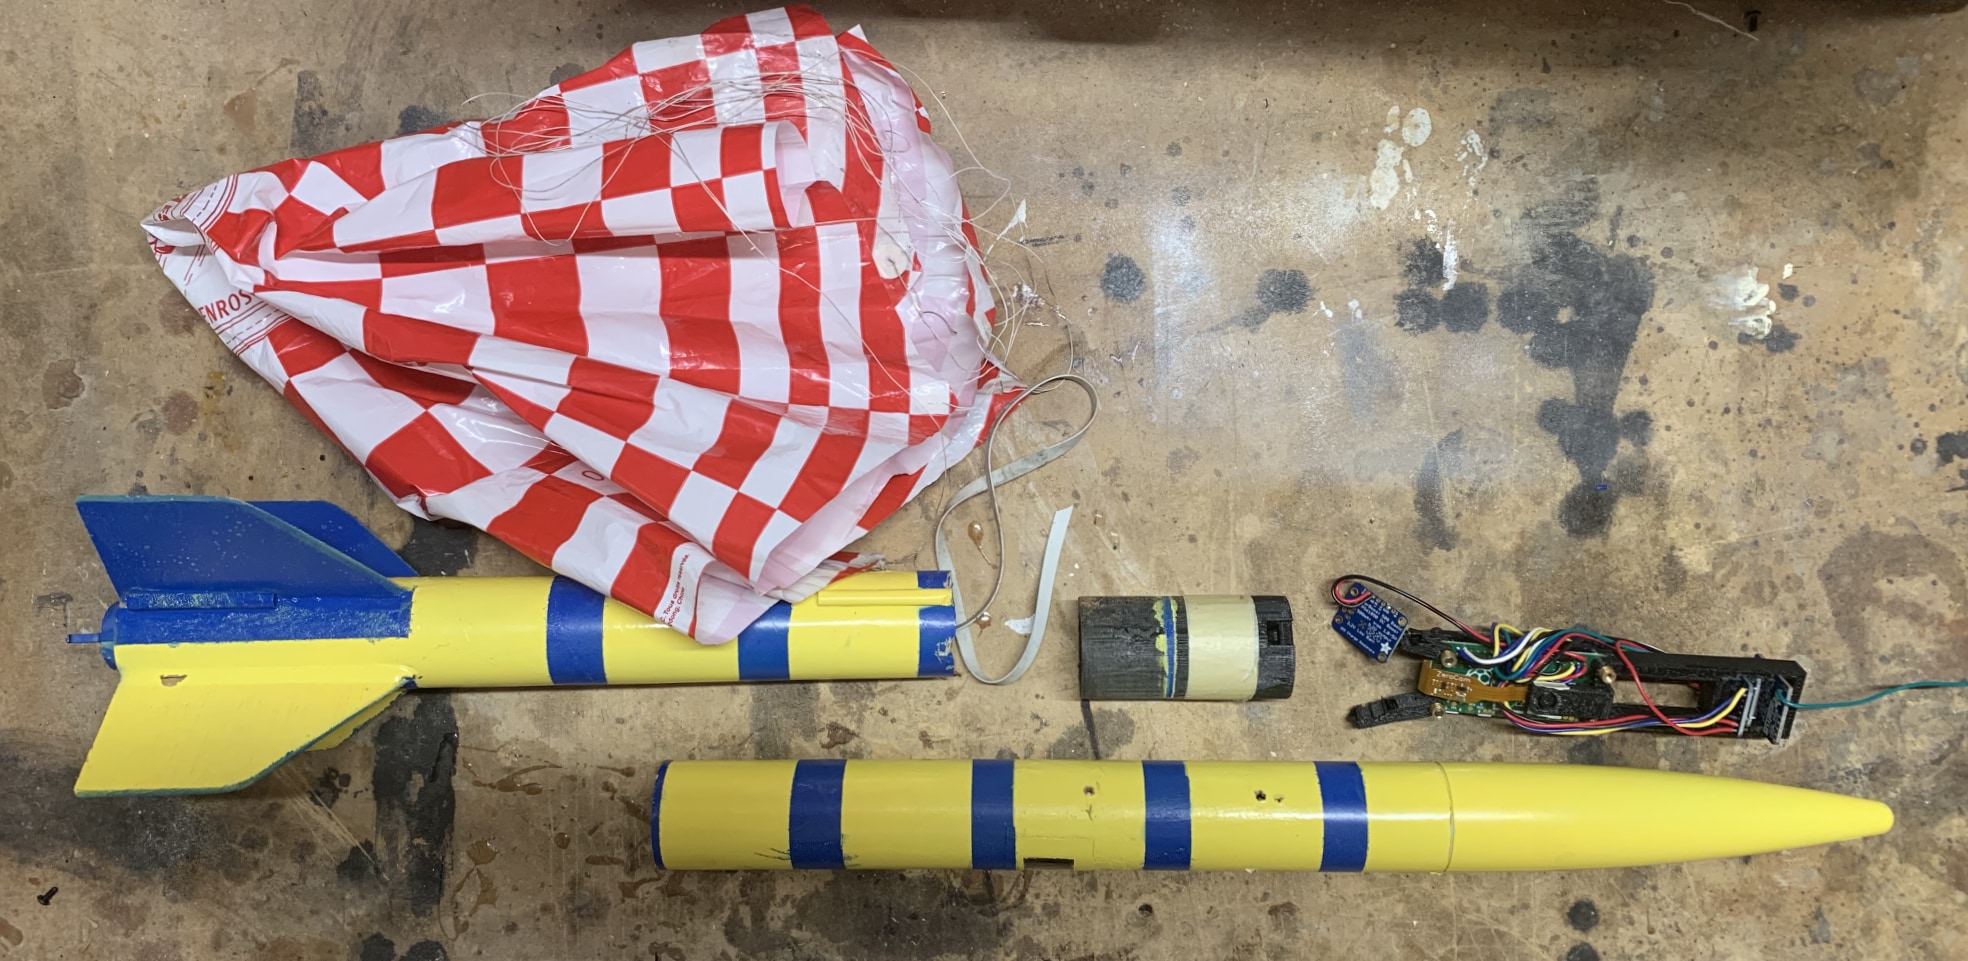
- The shock cord is not strong enough to absorb the force caused by separation, likely because of how heavy the payload is. In a future upgrade I will need to double-up the cords OR use two parachutes for each component to let them descend separately.
- When the payload section hit the ground, it drove the coupler way into the body tube. Upon impact, the battery bracket absorbed the force and shattered. However all of the electronics survived. Part of the coupler also broke off when I attempted to pull the it out of the payload section, so this will all need to be redesigned to better absorb hard landings.
- There must be a buffer that holds a certain amount of camera footage before saving it to disk. Because the battery disconnected in-flight, no flight video saved. I'd like to figure out how to write video data more frequently in case the battery issue happens again.
In addition to those major issues, I'd also like to make the following improvements:
- The software performed well, but I'd still like to increase the data capture rate. There are Adafruit libraries for the components I'm using in C++, so I'm considering rewriting
air.pyin C++, but I'd really love it if someone talked me out of that. - Between launches I manually rebooted the ground computer so that it would clear the visualizations and start logging to a new file. To make this easier, I plan to add the option to the dashboard to start new "capture sessions" without needing to restart the system.