Nighttime Time Lapse Photography with AllSky
A few weeks ago, I came across an intriguing article on IEEE Spectrum featuring a Raspberry Pi sky time-lapse project. The project utilized the standard Raspberry Pi HQ camera with a wide-angle lens, running an open-source program called AllSky to control and export time-lapse videos. Being fascinated by the intersection of cameras and astronomy, I couldn't resist taking on this project.
After researching the software and exploring my options, I discovered that AllSky supported various camera types. However, I leaned towards the Pi HQ camera due to its seamless integration with the Raspberry Pi and the abundance of compatible lenses. Despite the current scarcity of Raspberry Pis, I was fortunate to have a spare Pi 4 on hand. Note that AllSky can also run on a Pi 3B if that's what you can find. As for Raspberry Pi 5 support, I'm unsure at this point. I promptly ordered the HQ camera and a lens to kickstart the project. Notably, I opted for a super-wide-angle lens, stopping short of a fisheye, as my desired mounting location would render a fisheye lens capturing mostly my house and surrounding trees. The flexibility to choose the right lens is a distinct advantage of the Pi HQ camera.
Before delving into fabrication, it's crucial to test the basic hardware and software setup to identify and address potential issues. During this phase, I encountered a challenge as Raspberry Pi updated its OS to Debian Bookworm, which AllSky did not support at that moment. Although I attempted to install the dev branch addressing this issue, it proved unstable. However, the active contributor community reassured me that solutions were in progress. I reverted to the older Pi OS and successfully followed the AllSky setup steps. During installation, it immediately recognized the Pi HQ camera so there were no configuration changes needed to get it working.
Once AllSky was operational, I navigated the web interface to configure the settings. While the setup for nightly time-lapse videos is mostly turnkey, it's up to the operator to determine the destination. AllSky supports several upload protocols such as SFTP, FTP, and S3. Since I have a sizable Synology NAS on my local network, I created a dedicated account for AllSky with SFTP access to a new share. Configuring these parameters in AllSky was straightforward, although it required manual editing of a configuration file, a somewhat unconventional choice amidst a predominantly form-based interface. AllSky's support offers debug/testing tips for ensuring correct upload settings.
Again before continuing on with a build I wanted to make sure everything worked properly, so I let the camera run for a few days in my office. This allowed me to check the time lapse videos and make sure everything like focus was set properly.
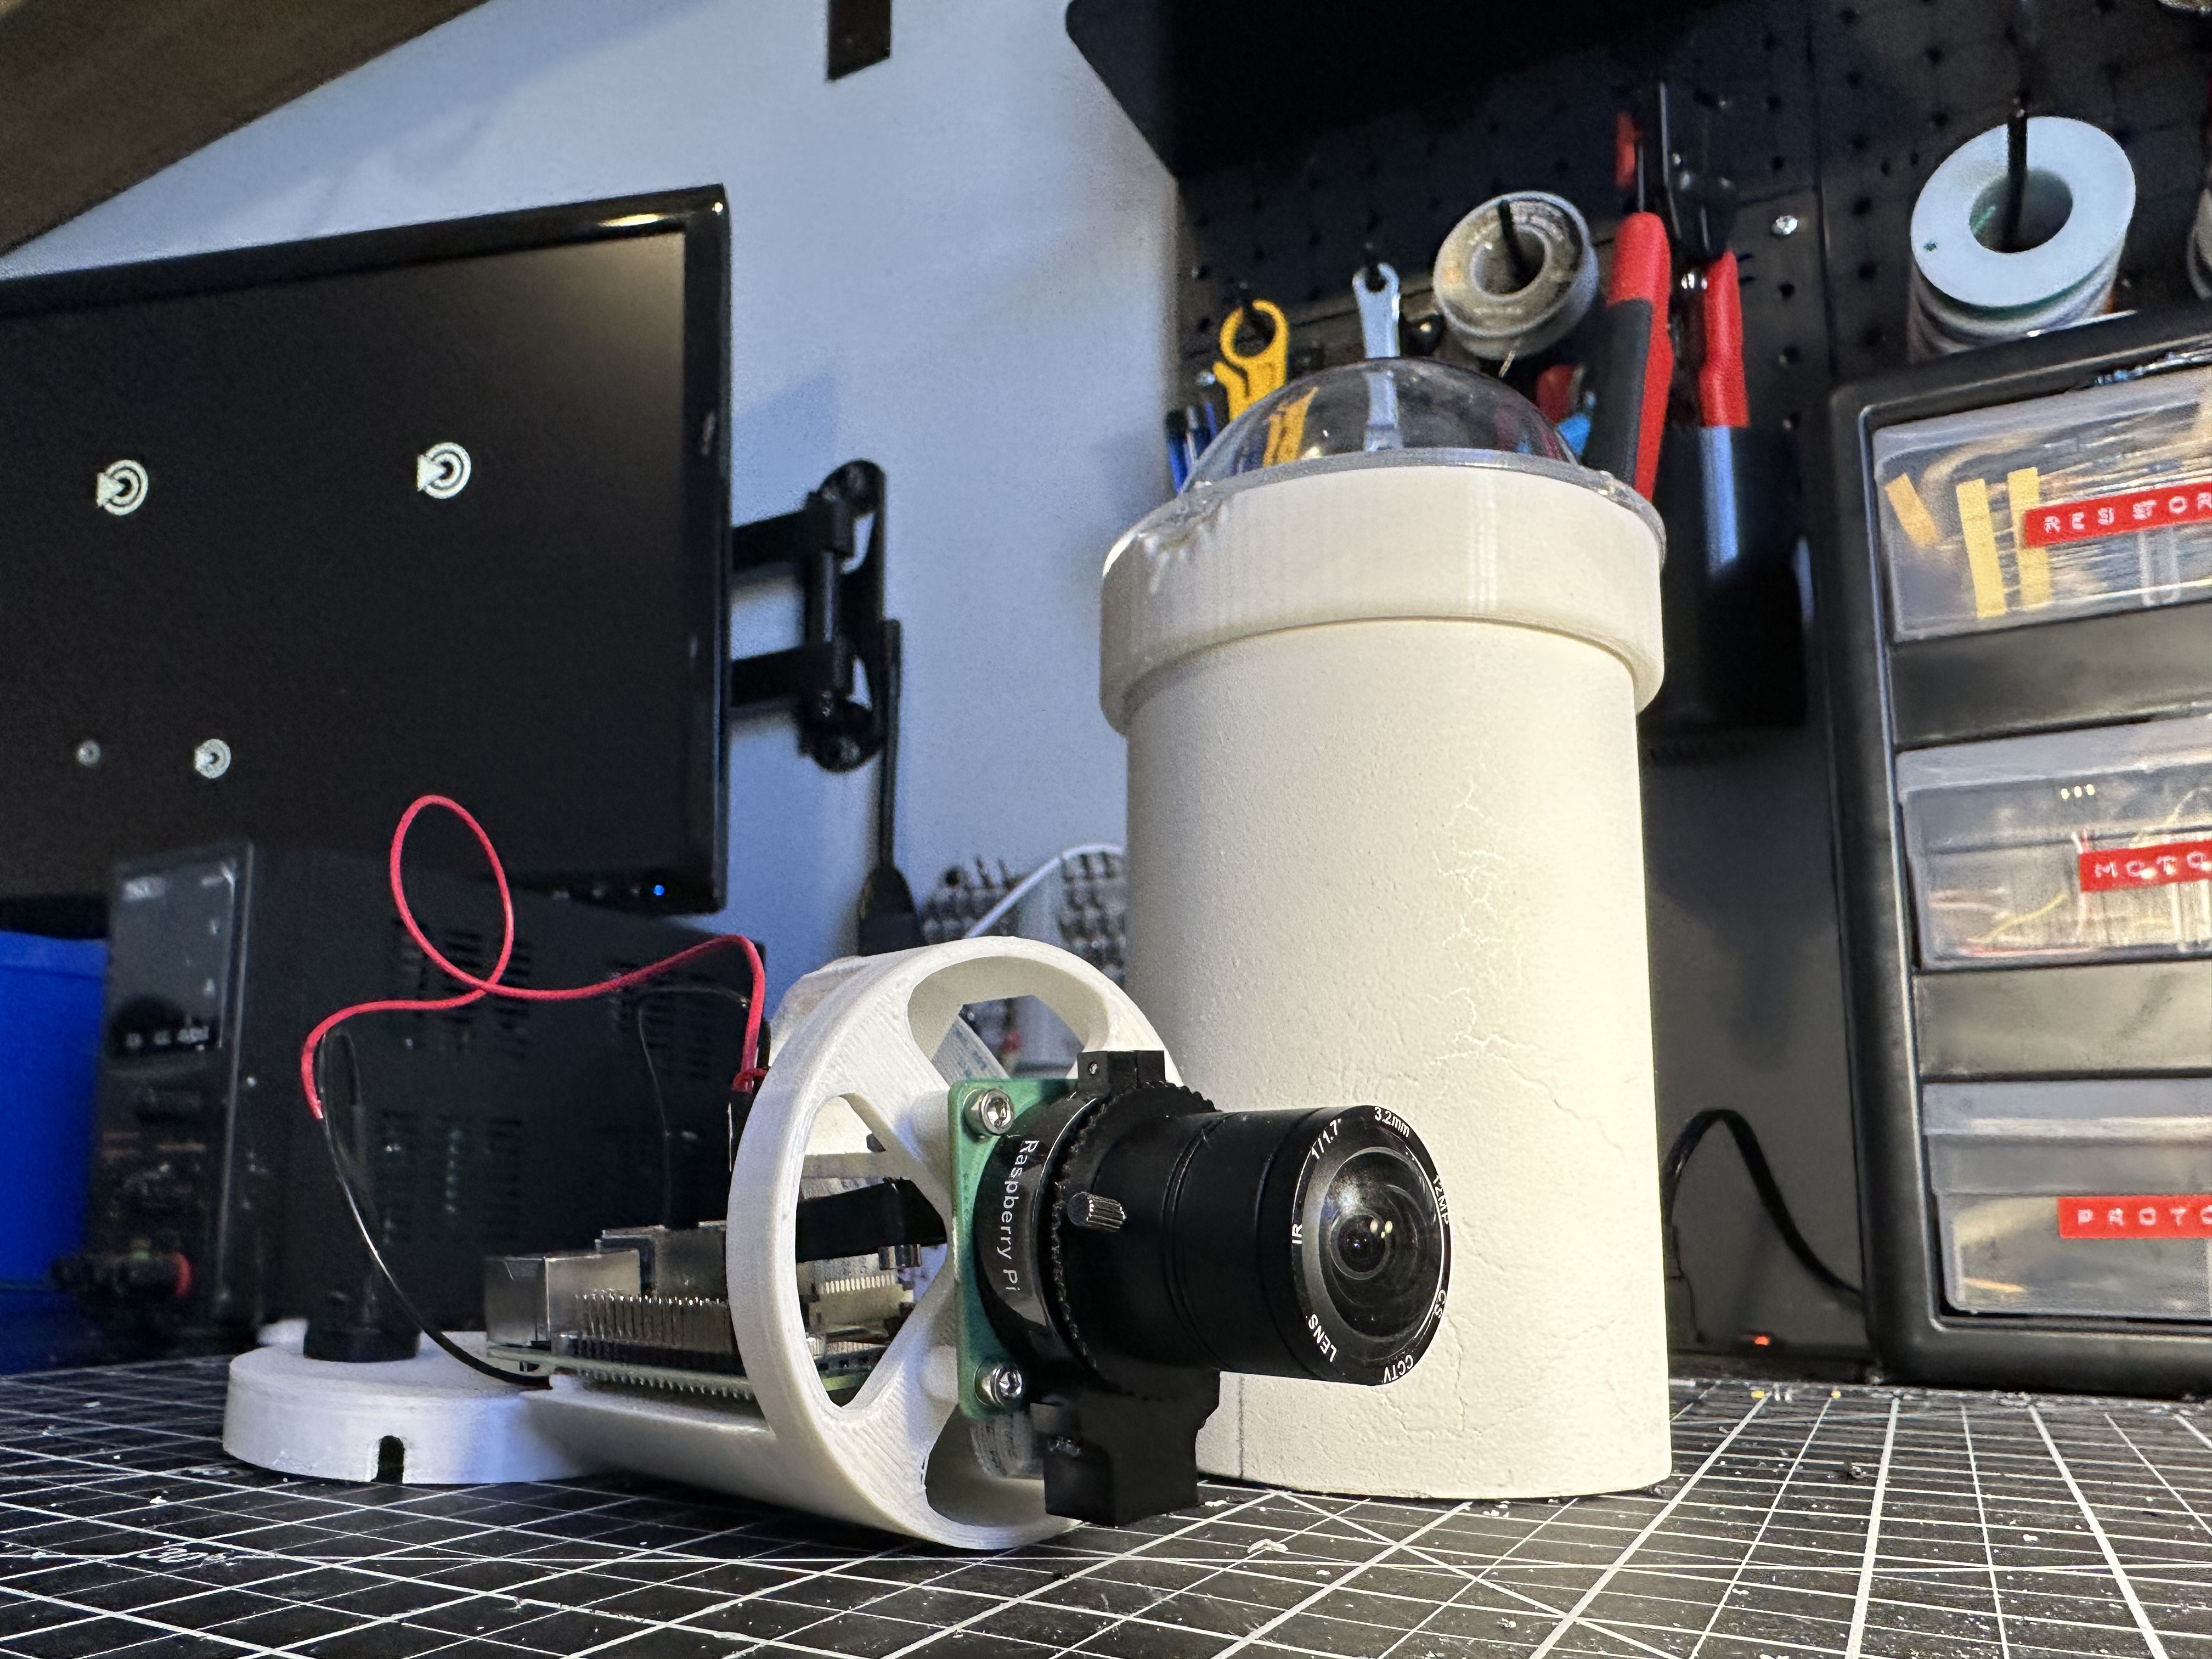
Simultaneously, I entered the housing design phase, inspired by the original PVC pipe housing that the creator of AllSky used. I, however, chose to design a model in Fusion 360 and 3D print it, deviating from the plywood chassis that he used. While there were existing AllSky housing projects on platforms like Printables and Thingiverse, none adopted the PVC pipe approach, which appealed to me.
Creating the models was straightforward, thanks to detailed schematics from Raspberry Pi and widely available PVC pipe dimensions. However I did go through three draft designs while I figured out key decisions such as: Should I include the camera mount with the dome connector or part of the chassis? (I made it part of the chassis.) How should I secure the chassis to the pipe? (Friction fit) Should I include a fan? (I did, mainly to help move air across the dome to prevent fogging.)
I 3D printed the internal chassis and dome adapter on my Ender S1 Pro and commenced the assembly. The compact chassis posed a challenge during assembly, but with some effort, I made it work. I also secured the security camera dome using Gorilla Glue and stainless steel M3 screws. It's already held up through one storm so far, so it seems like that was adequate.
Adopting a feature from the IEEE Spectrum article, I incorporated a watertight bulkhead connector to ensure a secure connection from the power supply to the external unit. In past projects I would've just soldered the connection from the cord directly in, but that always left some risk that an errant tug on the line would rip apart the electronics. With the bulkhead connector and the screws holding the bottom plate on, this is a nice tight connection that would be very hard to break.
With assembly complete it was time for installation. I chose to install my camera on a structure I had previously built for a weather station. (Which I also need to do a feature on at some point.) This location provided a relatively unobstructed view of the sky and an easy access to get the power cord inside to a GFCI outlet. I can't say my wife was too pleased with more electronics being mounted on our garage but she did eventually admit that the videos it produces are amazing.
Something to note here too is that I have a pretty robust home WiFi network and there's an access point just on the other side of a window from where I positioned the camera. Your miles may vary here and route I suggest taking if you don't think you can get a good WiFi signal in your installation location of choice is to purchase a Raspberry Pi Power over Ethernet hat and then run both the power and network connection to the Pi over that hard line.
Because I had taken time to setup and test AllSky inside, the system pretty much worked perfectly once I powered it back on, producing stunning nighttime time lapse videos every day and uploaded them to my NAS for long term storage. Two settings I changed were the relative brightness and contrast fields ever so slightly. This was necessary because the camera catches the top of my house which has a light colored siding that reflects the yellow hue of the sodium vapor street lamps. It's enough to confuse the auto balance in the software and drown out the stars, and so some customization was needed to really bring out the starlight in the images.
I also enabled daytime time lapse videos too which are just as stunning as their nighttime counterparts, particularly on a partially cloudy day where you can see those clouds whizzing by. My house is also in the landing approach zone for Dulles and a small private airport and so we see come cool shots of planes when they zoom by too.
Overall I'm very pleased with this project. Each morning, I eagerly watch the latest time-lapse video while sipping my coffee, captivated by the hypnotic spectacle of stars spinning with the Earth's rotation.